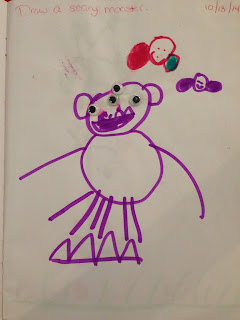
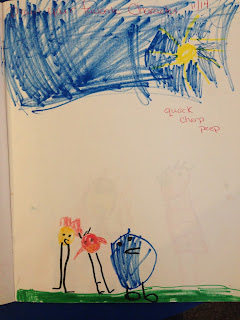
I absolutely love journaling! This is a great way to get my kids to really create what is going on in those little minds. It will also show a huge improvement in their drawing from the beginning of the year to the end of the year! I usually have them do an entry everyday but sometimes it doesn't happen. :/ Life of a Pre-K teacher.
Now I am lucky to have the budget to get small little journals from Beckers. If you do not have the budget or like to start right away I saw a great way to use recycled folders and papers. Maybe a thought for next year...hmmm
First Day!
Time to decorate the cover! They love doing this! I had for their first journal (which last till January) to do a self portrait on the cover using pre cut paper. I cute out different skin color ovals along with white eyeballs. I showed them how to put them together and how to add details. They were given mirrors to color the correct color of their hair and eyes! Well I asked did some follow?...not so much. It is their first day!
I tried to have journal entries follow the lesson but I also wanted to ask them random things to draw to see what they will do! Here are examples of a couple kids journals. Keep in mind these really are 4 and 5 year olds! Enjoy! I love these!
Pre-K Art
I am a Pre School Art Teacher in Philadelphia. I love art and being able to make it every day is so much fun. I like to be different and I like a challenge. I have a total of 30 students, 3 classes of 10 kids. That is enough! lol On my blog I have art projects that Pre K did...yes 4-5 year olders. I picked projects that I knew were difficult but they will surprise you! Never doubt them...they really will prove you wrong. I hope you like my blog...more and more projects to come!
Saturday, September 12, 2015
New and FUN IDEAS!

It has been a while since the last post! Sorry about that! I have been doing some crazy research to find better projects to challenge my little 4 and 5 year olds. This year (2014-2015) I have come up with a great curriculum that allowed the children to create amazing projects but also to help improve their motor skills and their general art knowledge! Also this year was the FIRST year of our schools art show. It went amazing! That will be in another post! I will now start posting some really great projects to show everyone what we are capable of doing. BE JELOUS! :)
Saturday, April 27, 2013
Hot Air Balloons
Hot Air Balloons
Paper Mâché
Believe it or not...Pre K is amazing paper mâché! They handle it well and can complete it with no help! Shocked me!
 So we are talking about how it is warming up and what we like to do on nice days. We talked about hot air balloons and I showed them some videos on YouTube of hot air balloons. Got them really interested and they loved how they get the hot air balloon together! Very important to get them thinking about designs now so before starting I drew a blank hot Air balloon, made copies and have them design the ballon. I showed them some with designs, faces, patterns, etc.
 Once they have an idea we started. I had pre cut squares of news paper ready along with glue/water mixture. I blew up the latex balloons...GREAT TIP, for the balloon to stay still put a piece of scotch tape to the table..better if the table has paper covering it so it sticks good to the paper. Warning...don't tAke the tape off when it drys just paper mâché over the tape because it will POP! I had the kids paper mâché one side one day then do the other side the other day. stress to them that you want them to take ONE piece at a time and you want overlapping. Now my kids learned what overlapping is so definitely demonstrate that. Tell them you do not want to see any balloon showing. That is why I got color balloons and not white so they can make sure they cover every bit of the balloon.

Tricky part, to get that little lip at the bottom of the balloon, I cut prices of paper towel rolls and had them glue it on. They sat over night, I used tacky glue so it will stay.
Design time! I gave the. Their papers back for reference but I STRESS to them about making a design of some sort, I didn't want them to just throw paint on their if they didn't have an idea on what they wanted to do! Very creative children...I'm telling you! We used tempra paint, now through the painting stage I have the balloon under the paper still inflated. I do not deflate it u till the paint is fully dried! You can leave the balloon in but it stays when you deflate it too.
For hanging...I used a safety pin and put a hot in the top middle of the balloon. It will probably pop it...all good. Then I took a paper clip and hooked it through the hot and puncture another hole to get the clip out. After I did that I used Tack Glue to the holes so it doesn't rip during hanging.
Basket- I cut a small plastic cup (Great Earth Day! Perfect planning time! lol) and made an outline on color paper so it will fit perfect to the cups. Once I got the outline and did a couple different color papers and put the outline on them. The kids were instructed to pick a color BUT! they must draw something on there. They were not to scribble, the paper is already color they don't need to scribble all over it. I wanted pictures, polka dots, strips, etc. Once they were done they were to cut it out. I put the paper on the cups and stapled it.
Connecting the basket. Now this is tricky. If you want the kids to do it like I did I needed to be there to help so it took me two kids at a time. So have the other kids color or something to occupy them. I them showed them step by step how to thread it properly. Great motor skills activity!
Once it is finished BAM you got yourself a Hot Air Balloon!!
Subscribe to:
Comments (Atom)


